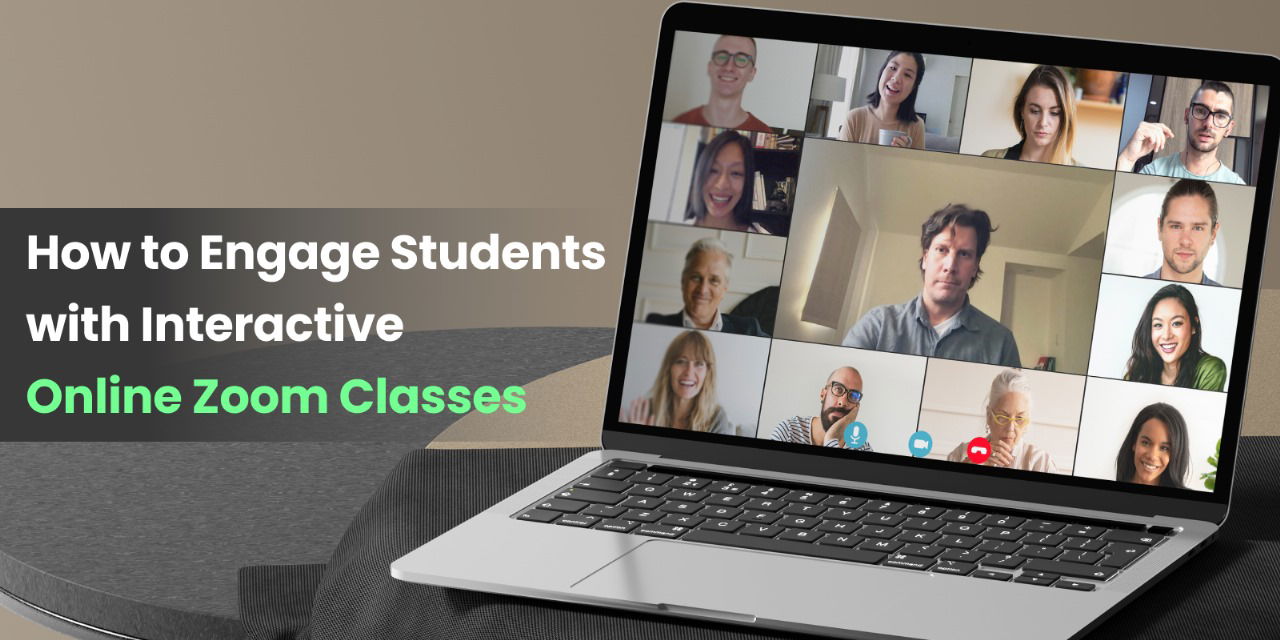
Engaging students in your online classes is a crucial matter
There are a few handy engagement tricks in online courses. Have you ever felt live classes are one of the most interactive ways to connect with your students?
Today, you will know how to engage more students in your online courses.
Live lessons create real-time interactions among students and teachers. This way, you can enhance the learning experience and student motivation.
This article will explain the ultimate guide to engaging students with interactive online Zoom classes. Let’s get started.
5 Benefits of Online Zoom Classes in Learning
Zoom has added a new dimension to online learning, offering a dynamic platform that facilitates live interactions between instructors and students. Its user-friendly interface and useful feature set make it an ideal choice for educators looking to create engaging and interactive lessons. Here are some key benefits of online Zoom classes in online learning:
1. Real-Time Interaction: Zoom enables live video and audio communication which allows students to interact directly with the teachers and vice versa. This real-time engagement helps create a more connected and responsive learning environment.
2. Effective Features for Better Teaching: Zoom's array of features, such as screen sharing, waiting rooms, and virtual whiteboards, provides educators with versatile tools to enhance their teaching methods. These tools support various teaching styles and can be tailored to different types of content. Teachers can show videos, infographics, and slides using screen sharing to make students learn efficiently.
3. Accessibility: Zoom is supported on multiple devices, including smartphones, tablets, and computers, making it easy for students to join classes from anywhere. This flexibility ensures that learning can continue uninterrupted, regardless of location.
4. Recording Capabilities: Zoom allows for easy recording of sessions, enabling students to review lessons at their convenience. This is particularly beneficial for students who may need extra time to understand complex topics or for those who missed the live session.
5. Engagement and Collaboration: Features like breakout rooms, hand-raising, reactions, and chat functions encourage group work and peer-to-peer interaction, nurturing a collaborative learning community environment. Students can work together on projects, participate in discussions, and support each other's learning.
How to Prepare Your Interactive Lesson for Online Zoom Classes
Creating an engaging and effective interactive lesson with free online Zoom classes involves careful preparation. Here’s a streamlined approach:
Define Objectives: Clearly outline your lesson goals. For instance, if you’re teaching a marketing course, specify whether you want students to understand a specific concept like SEO or to complete a practical task like creating a marketing plan.
Organize Content: Break your lesson into segments to maintain attention. For example, start with a 10-minute lecture on SEO basics, followed by a 15-minute interactive Q&A session, and then a 20-minute hands-on activity where students analyze a website's SEO. Get ready with any external videos, images, or infographics that you want to share externally. If you want to show hands-on exercises then make sure that all the software and screen-sharing features are working perfectly.
Plan Interactive Elements: Decide when to use interactive features. Use breakout rooms for group discussions on specific topics, such as brainstorming marketing strategies. Incorporate polls to get instant feedback on student understanding, like gauging their familiarity with SEO tools. Use screen sharing to demonstrate how to use an SEO tool in real time.
Prepare Materials: Gather all necessary materials like slides, videos, and external tools. For example, have a presentation on SEO ready, along with a video tutorial and links to online SEO tools. Ensure these materials are organized and accessible during the lesson to avoid disruptions.
Test Setup: Familiarize yourself with Zoom features and test your setup before the session. Ensure your internet connection is stable, your camera and microphone are working, and all interactive features are functioning. Conduct a trial run of your lesson to identify any technical issues.
Also read: 20 Best Online Course Platforms in 2025
How to Use Zoom for Online Classes as a Teacher
You can utilize Zoom's interactive features for better interactions.
Zoom offers a variety of features designed to enhance interaction and engagement during online lessons. Here’s how to use Zoom for online classes as a teacher:
1. Screen Sharing: Use screen sharing to present slides, documents, videos, graphs, or live demonstrations. This feature is excellent for visual learners and helps to keep the lesson organized and on track.
Tip: Use annotations to highlight key points during your presentation. This makes it easier for students to follow along and understand complex information.
2. Breakout Rooms: Breakout rooms allow you to divide students into smaller groups for discussions or collaborative work. You can split your Zoom meeting for up to 100 sessions in this way. This feature nurtures a more intimate and interactive learning experience.
Tip: Assign clear tasks or discussion points for each breakout room session to ensure productive use of time.
3. Polling: Create polls to gather instant feedback or to quiz students on the material covered. Polls are a great way to keep students engaged and to check their understanding in real time.
Tip: Use poll results to guide your teaching. If many students get a question wrong, you can revisit the topic immediately.
4. Chat and Reactions: Students can use the chat function to ask questions or share their thoughts without interrupting the flow of the lesson. Reactions (like raising a hand or clapping) provide a non-verbal way for students to participate. Students can raise their hand before speaking which allows the teachers to pause their lecture and take a question at their convenience.
Tip: Monitor the chat and address questions either during designated Q&A times or at natural pauses in your lesson.
5. Whiteboard: The whiteboard feature brings a whiteboard on which you can draw anything for visual explanations of concepts. Both you and your students can draw or write on the whiteboard in real-time. You can also save the whiteboard sessions for future use.
Tip: Save whiteboard sessions and share them with students after the lesson as a reference.
6. Recording: You can also record your sessions so that students can review them later. This is especially useful for students who may need to revisit the material to fully grasp the concepts or someone who missed the live sessions partially or fully.
Tip: Inform students at the beginning of the session that it will be recorded and explain how they can access the recording.
7. Background effects: One of the main objectives of using Zoom for online live lessons is that students would be able to join the meeting from anywhere. So, if you are not in a formal place, it won't be a problem. Suppose, you are outdoors and your background is distracting. You can simply add a blur to your background or completely change the background with tons of presets before joining the meeting.
Tip: Join the meeting room a bit early to apply the background effect and set it up accordingly.
Also read: 10 Best Online Quiz Makers for Teachers
How to Use Zoom for Online Classes in EzyCourse
Zoom is fully integrated with EzyCourse. Setting up live interactive sessions within EzyCourse is simple and streamlined, allowing you to utilize Zoom’s powerful features to enhance your teaching. Here’s how to get started:
Step 1: Create a Zoom Meeting
Log in to the EzyCourse’s Dashboard: Start by logging into your EzyCourse account and navigating to the Meetings section under Products & Services.

Create a Zoom License: If you’re entering the Meetings menu for the first time, you may need to click the "Create Zoom License" button. The system will automatically set up the Zoom license for you.
Schedule Your Meeting: Click the "Create Meeting" button at the top right of your screen. Fill in the necessary details such as meeting topic, agenda, date and time, time zone, and duration.

Set Meeting Preferences: Customize your meeting settings:
Enable Waiting Room: Manage participant entry.
Allow Join Before Host: Let participants join before you arrive.
Recording Options: Choose to automatically record meetings to the cloud or locally, or disable auto-recording if not needed.

Step 2: Manage and Share Your Meeting
Access Meeting Details: Once your meeting is created, you can view all its details, including a countdown timer, directly from your dashboard.
Join the Meeting: You can join the meeting directly from your dashboard.
Share the Meeting Link: To share the meeting link, click the three dots next to the meeting and select "Share Meeting Link." Copy the link from the popup to distribute it to your participants.

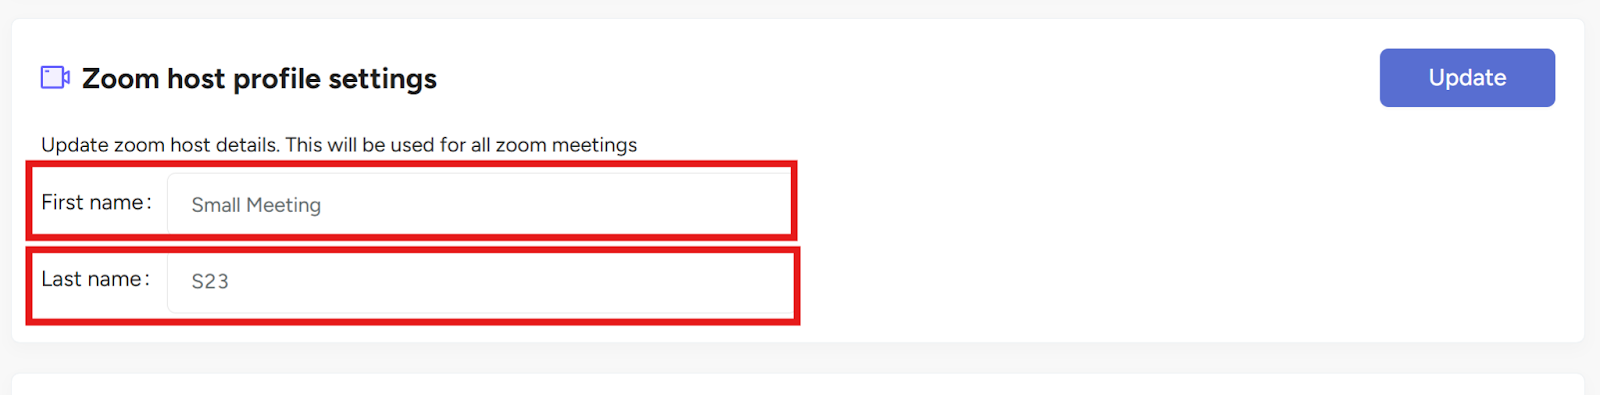
Customize Your Host Name: Adjust your hostname through Site Settings → Global Settings. Note that changes made here will apply to all future meetings, but you can also temporarily change your name for individual meetings within the meeting itself.

Step 3: Integrate Zoom Meetings into Lessons and Communities
Add Meeting to a Lesson:
When creating or editing a live lesson, select "Meeting" as the live lesson type.
Choose from the dropdown menu containing existing meetings or create a new one directly from this interface.
Click "Create" to finalize the lesson with Zoom meeting integration. Students will see a countdown timer on their lesson view.
Add Meeting to Communities:
Navigate to the Meetings tab within your community.
Select an existing meeting and click the "Add Meeting" button to integrate it into your community.
By following these steps, you can easily set up and manage interactive Zoom sessions within EzyCourse, providing your students with a seamless and engaging learning experience.

How to Conduct Online Classes on Zoom: Challenges, Troubleshooting, and Useful Tips
While Zoom integration with EzyCourse offers a powerful tool for live interactive sessions, it can come with its own set of challenges. Here are some common issues, troubleshooting steps, and useful tips to ensure a smooth experience:
Common Challenges of Using Zoom
Connectivity Issues: Unstable internet connections can disrupt live sessions.
Audio/Video Problems: Microphone and camera issues can affect communication.
Technical Difficulties with Features: Problems using breakout rooms, screen sharing, or other interactive features.
Student Engagement: Keeping students engaged and participating actively throughout the session.
Security Concerns: Managing unwanted attendees or disruptions during the session.
Troubleshooting Steps for Online Classes on Zoom
Connectivity Issues:
Check Your Internet Connection: Ensure you have a stable internet connection before starting the session. Consider using a wired connection for more reliability if possible.
Bandwidth Management: Close unnecessary applications and background processes that may be using up bandwidth.
Audio/Video Problems:
Test Equipment: Before the session, test your microphone and camera to ensure they are working properly.
Settings Check: Verify that your audio and video settings in Zoom are correctly configured. Ensure that the correct devices are selected.
Technical Difficulties with Features:
Pre-Session Testing: Familiarize yourself with Zoom’s features and test them out before the session. Conduct a trial run if necessary.
Zoom Support Resources: Utilize Zoom’s extensive support documentation and video tutorials for troubleshooting specific feature issues.
Student Engagement:
Interactive Elements: Incorporate various interactive elements like polls, Q&A sessions, and breakout rooms to keep students engaged.
Encourage Participation: Prompt students to use the chat feature or raise their hands for questions. Regularly ask for feedback or input to maintain engagement.
Security Concerns:
Enable Waiting Room: Use the waiting room feature to control who enters the meeting.
Manage Participants: Assign a co-host to help monitor and manage participants. Use features like muting and removing disruptive attendees if necessary.
Useful Tips for Online Zoom Classes
Preparation is Key: Thoroughly prepare your lesson materials and interactive elements in advance. The more organized you are, the smoother the session will go.
Practice Makes Perfect: Conduct practice sessions to get comfortable with Zoom’s features. This will help you handle any issues that arise more confidently.
Stay Flexible: Be ready to adapt if things don’t go as planned. Technical issues can happen, and being flexible will help you manage the situation effectively.
Engage Regularly: Keep the session interactive by regularly engaging with students. Ask questions, prompt discussions, and use interactive features to maintain interest.
Provide Support: Offer technical support to students before and during the session. Share troubleshooting tips and be available to help with any issues they encounter.
Online Zoom Classes: Final Words
Zoom provides powerful tools for creating engaging live lessons. Its real-time interaction, versatile features, and ease of access make it ideal for online learning. By integrating Zoom with EzyCourse, you can easily set up and manage interactive sessions.
Using online Zoom classes and EzyCourse together, you can deliver high-quality, engaging lessons that keep students connected and motivated. This combination simplifies the technical side of live teaching and enhances the overall learning experience, making it easier to create and manage effective online lessons.
Hopefully, this guide has helped you on how to conduct online classes on Zoom.


